Showing posts with label baking. Show all posts

Sunday, April 5, 2020

Zesty Madeleines

Hey fellow quarantine people! 
After going through our kitchen and organizing a bit, I found my Madeleine pan and decided to make some yummy spongy treats! But I would need to use what I already have....which wasn't much. Fortunately we happened to have a bunch of tangerines that will make a great citrus zest!

Madeleines are pretty simple...thank goodness! I made them awhile ago but couldn't quite remember the process. You start by combining 3 eggs, 2/3 cup of sugar and tangerine zest in a bowl. You really only need 1.5 tsp of zest for the flavor to come out. But feel free to add more if you like but don't over do it LOL!
Next you whisk together the dry ingredients, 1 cup of flour, 1 tsp baking powder and 1/4 tsp of salt. Then combine the dry ingredients into the egg mixture and add in 6 tbsp of melted butter and voila! Your dough is complete!
One important part of making Madeleine cookies is that the dough needs to chill for at least an hour, allowing for the traditional Madeleine "hump" to form during baking. 
After chilled, add 1 tbsp of dough to each Madeleine imprint. But don't worry, the dough will spread out on its own, so no touching he he. *Be sure to coat your pan in baking spray beforehand.
Bake at 350 degrees for 7 to 8 minutes, or until edges are golden. Then once cooled, sprinkle powdered sugar and serve. These cookies are at their best on the day they are baked, but the dough may be made about 2 days ahead of time.
Jack was a little disappointed that he could not try these delicious French cookies, but he was proud of me for wrangling together ingredients to make them. He's so supportive! They were indeed yummy and spongy. Like a Twinkys classy uncle ha ha!
While mixing up these Madeleines my mind wandered to New Orleans. It could be the simplicity of the southern lifestyle or the warm feeling that catches in my chest when thinking of our trips there...it could be both. But I suddenly had a clear vision of a small two story home in the French Quarter, small balcony lined with a few Mardi Gras beads and hanging plants. A stoic cat perched on a filigreed chair, in front of green window shutters, gazing out into the world. The day starting to warm and the streets filling with visitors. Having a small shop with my art and fresh cookies, open and waiting for guests. Light reverberations of blues flowing through the walls and the distant smell of gumbo in the air. This image makes my heart so happy, someday it could be true, but back to reality I go.
 Thinking of French treats, it would be an uplifting idea for everyone to pick something they will make, once the lock downs are over. Something delicious to share, or just to celebrate the end of this surreal reality. I'm choosing beignets, I'm sure you could have guested that ha ha! Hopefully I will get to make them soon! 
Cheers!
-Bunny

Saturday, November 23, 2019

Cookie-dough Bites!

Hello Lovelies! 
I wanted to share one of my favorite Sakara treats! Cookie Dough Bites. These little morsels are packed full of flavor and really bring a smile to my day.
To start take a 1/2 cup of almond butter mixed into 1/4 cup of maple syrup and vanilla until smooth. 
In another bowl mix together the dry ingredients: 1/4 cup of coconut flower, 3 tablespoons of flax-seed meal and salt. Then mix the wet and dry ingredients together and fold the cacao nibs in. Once mixed properly roll the dough into 1 inch balls and set aside. 
Mix together shredded coconut and hemp seeds that will be used to roll the dough balls in. Feel free to pick any type of  topping but the coconut is yummy. After rolling your bites into the mix refrigerate the bites for about 30 mins, before serving. 
These bites are pretty simple and much more of an almond bite than traditional cookie dough. However, I really love them and don't feel guilty for scarfing them down. Plus they definitely have more protein and less artificial ingredients.
Thanks for readin!
-Bunny

Monday, September 4, 2017

Love of Pralines!

Howdy!
This weekend summer decided to have one more hot day before giving in to winter. The air was thick, sticky and just plain hot! Naturally this made me think of New Orleans. I couldn't help but remember wandering those packed streets, listening to jazz and stopping to take a peek in every unique shop. One in particular had pieces of pralines to try. So creamy and perfect bites filled with pecan flavor. I'm sure the cashier noticed as I would casually pass by the tray while I perused. Missing this delish staple of New Orleans, I went to my Damn Good Sweet cookbook for a simple praline recipe and it was simply delicious. 
To start I melted butter, cream, brown and white sugar together until they reached 220 degrees. Then I folded in the pecans and turned off the heat. Next I spooned out about 2 tablespoons per praline onto a baking sheet. 
I did not have any parchment paper, so tin foil had to do. *Just be sure to use something or your pralines will stick to the pans like glue! They did get a little messy, in the future I would want to use something to shape them into more perfect circles. I wondered how Aunt Sally's did it. They had achieved praline perfection! 
It did not take long for them to cool down and stiffen. Craig did try to pick at them before hand lol! I was surprised that they were ready to serve so quickly. I peeled one off the tray and took a bite...YUM! These pralines turned out pretty well, maybe a bit too sugary but each bite took me back to NOLA. Sweet with a bit of pecan crunch. They were not as creamy as I imagined but I think that might require more cook time or more cream. Either way I found another way to eat pecans and reminisce he he! Now this hot day didn't seem so bad.
I am definitely coming back to this sweets cookbook soon!
Thanks, Bunny

Thursday, April 27, 2017

Sakara Love

Howdy!!
So I am in complete love with these Dark Chocolate Cardamom Cookies from Sakara! LOVE! I didn't even know I liked cardamom. Such a great treat...not too sweet, not too savory. Perfect! They are so yummy but a bit too pricey to order all the time :(
A week or two after my last cookie had been eaten I started craving the spice and nutty almond butter of the Sakara cookies. I had to have more, so I decided to try making my own. The main ingredients call for almond flower, almond butter, cardamom and honey. While these still have sugar in them, it was nice not adding in a stick of butter, sugar and a few eggs. Also, you add in chopped dark chocolate. I have never been a huge dark chocolate fan, it can be so bitter, but these cookies turned me around! Such a good combo!
For this mix you have to let it chill out in the fridge over night but that didn't stop me from eating some of the dough he he! 
After rolling out little dough balls onto my cookie sheet and giving them a quick bake, they were ready! So delicious and just like the Sakara ones. They look a little different but it's probably how I molded each one...a little too smooth/round.
Tip: Definitely use a paddle mixer instead of a whisk. The dough became thicker with each ingredient and wasn't the easiest to mold. Plus I added in dark chocolate chips but will chop up the chocolate a bit more when I make them again. That's right, again, again and again ha ha! 
Or I may add the Sakara ones to a Clean order as a special treat. See the link below for the Sakara Clean Boutique. Such great products! I would recommend the beauty and detox waters as well!
Cheers, Bunny

Friday, March 3, 2017

Bunny Vanilla Sugar Cookies

Happy Friday!! 
To celebrate a bit of spring showing through all of the rain, I made bunny shaped vanilla sugar cookies. My sister-in-law gave me this little kit for Christmas! It came with mix, marshmallows and a cookie cutter. 
I simply added an egg and some butter, mixed until the it turned to dough. I covered it in saran-wrap and put the dough in the fridge for about an hour.
I preheated the oven to 350 and began rolling out my dough on a cookie sheet using plenty of flour. I cut out little bunnies and arranged them on the tray to bake for about 10 mins. *check on them to make sure they are a little brown on the edges but be careful not to leave them in for too long. A couple of my bunnies didn't make it...they were cut a bit too thin LOL!  For added awesomeness I sprinkled a few of the bunnies! I do love my sprinkles! 
After baked and still warm, add the marshmallows for little cute bunny tails. Voila! Vanilla Sugar Cookies ready to serve. Super adorable and tasty! 

 I thought that Craig might like them with some chocolate so I melted a half cup of dark chocolate chips and drizzled them on top. He was thrilled he he! Thank you Amy for this wonderful gift, perfect for a Cake Bunny!
Thanks for readin!! xoxo
Love, Bunny

Monday, December 5, 2016

Mint Chocolate Chip Fudge

Good Morning!! 
Last night I made some yummy Mint Fudge! 
They turned out great so I decided to bring them into work. Mint has always been a favorite of mine so when I saw this simple recipe for fudge I had to try it out. Plus who doesn't love mint chocolate chip....a crazy person that's who!
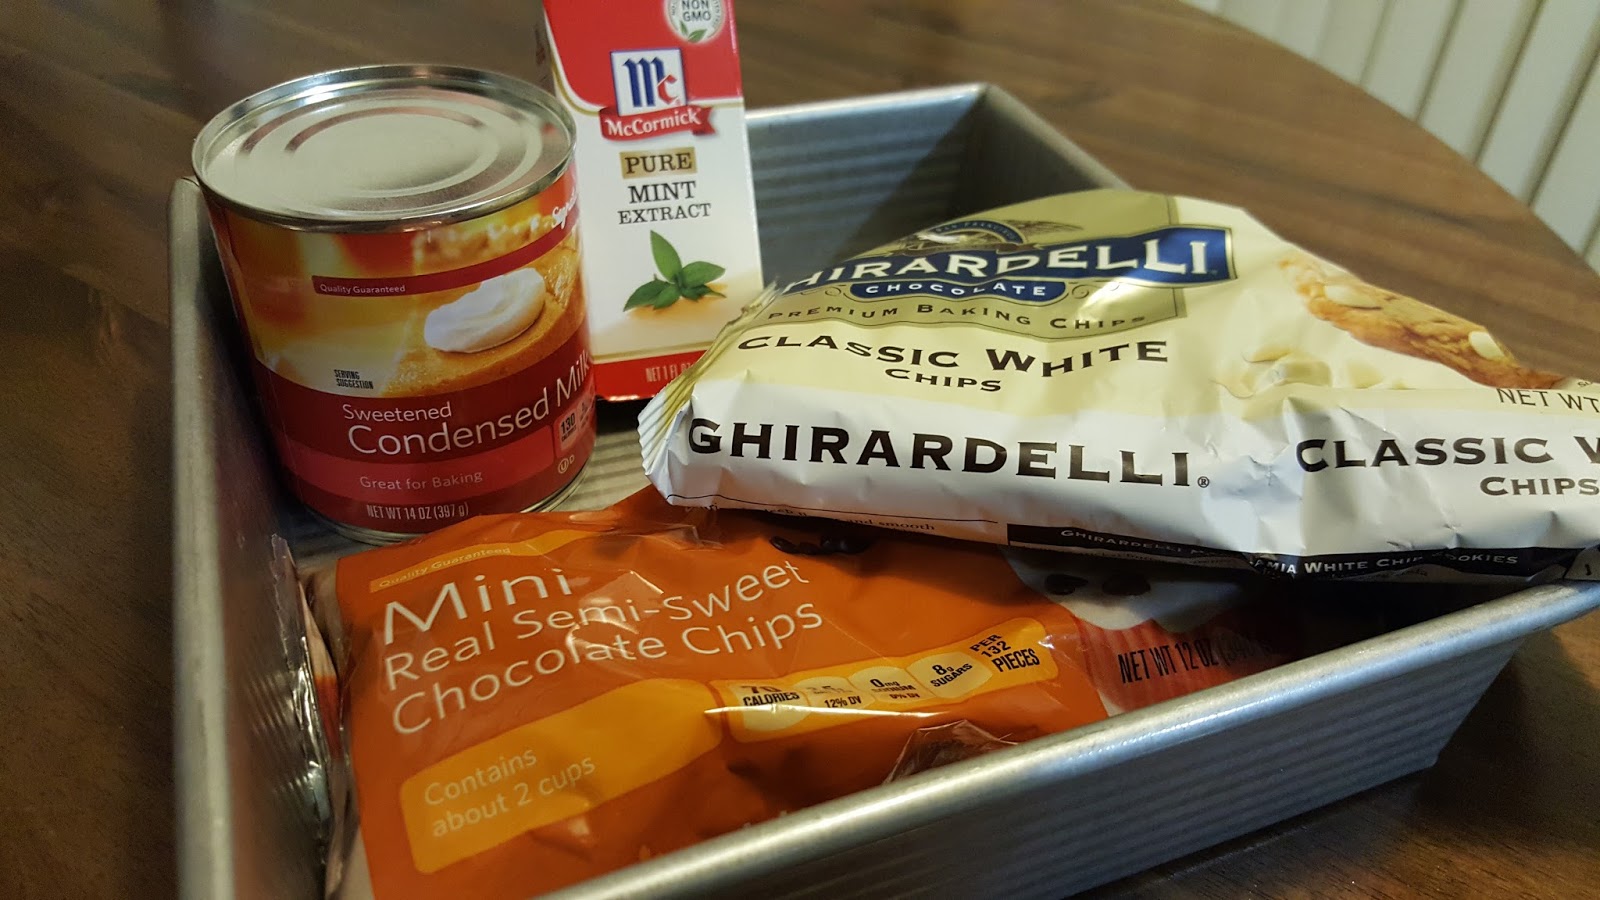
What you will need: 
3 1/4 cups of white chocolate chips
2 tablespoons of butter
1 can of sweetened condensed milk
2 to 3 teaspoons of mint extract, NOT peppermint
Green food coloring
and 3/4 cups of mini chocolate chips
First you need to line an 8x8 square plan with tinfoil and some cooking spray, next microwave the white chocolate chips and butter for 1 minute. Stir together and make sure that all chips are melted.
Mix in the condensed milk and mint. Add the green food coloring, about three drops. Once mixed completely let the mixture sit and cool off a bit, then fold in half of your mini chips!
Add the fudge to your pan and press evenly. Add the remaining mini chips to the top of the fudge. Refrigerate for about 2 hours then VOILA! 
Mint Chocolate Chip Fudge! Make sure to share he he!
Thanks! Bunny

Monday, October 3, 2016

Madeleines

Good Morning, 
So I lied! I ended up not making pie (yet) and went for some spongy-goodness in the form of madeleine! Besides their obvious yum factor I had been given a madeleine pan as a wedding gift (about time right!?) and every single morning my new boss comes into the office, sits down, and eats a madeleine. These were too perfect!
I found a simple recipe online and started putting my ingredients together. 
2/3 cup of flower
1 teaspoon baking powder
1/4 teaspoon fleur de sel (salt)
1/3 cup sugar
Finely grated lemon zest (1 lemon)
2 eggs
1 tablespoon honey
1 teaspoon vanilla extract
1/2 cup unsalted butter, melted (leave a little unmelted for the pan)
2 tablespoons whole milk
____________________________________________
Alright! Onward to deliciousness!
In a small bowl mix together the flour, baking powder and salt, set aside. Place the sugar and lemon zest in a bowl, mix and rub together with your fingertips until sugar becomes moist. This created such a fresh lemon scent!  
For convenience, I went ahead and placed the sugar zest into my big mixing bowl and then added the eggs, giving me a lot more room! Whisk the mixture until it thickens a bit. Next add the honey and vanilla. Gently add the flour in (in three parts) and then the butter. Lastly, carefully stir in the milk. The batter will begin to look smooth and shinyCover the bowl with plastic wrap and set in the fridge for about an hour. 
While you wait, butter and flower the madeleine pan. After the batter has properly chilled out, he he! spoon it into the pan and then set in the fridge for another hour. The batter will set into the molds and give it the classic madeleine shell shape! Set the oven to 400 degrees and place a large baking sheet inside for the madeleine pan to sit on. This helps to preheat the pan/process. 
Next, remove from fridge and place the madeleine pan into the oven and set your timer for 13 mins. I found that it really did not take long for them to bake, so be sure to check on them and to not leave them in too long!
After they have turned a lovely golden color (note: wait until the bumps spring back when touched), quickly remove the madeleines from the oven and release them from the pan. After a short cool-off dive in!
The madeleines were fluffy with a slight crispness on the edges. The lemon flavor was there, but not overpowering and on top of being simple to create they had the perfect amount of sweetness. Craig was pleased as well he he! So...here is another dessert that is dangerous to make, just like those pesky French macaroons! So so so yummy!!! I think I had 4 of them he he! 
Thank you for reading and stay tuned for my next creation. 
-Bunny
Ps. I brought some in for my boss, cheers Mark!

Tuesday, March 29, 2016

Hummingbird Cake

Happy Easter! 
This year I wanted to make something truly delicious for my family and had seen a recipe for Hummingbird Cake on MyRecipes. Turns out that this is a really popular cake and it seemed so interesting that I wanted to taste it for myself. I didn't do a play-by-play for you...I thought about it but for once it was nice to really focus on making the cake. It was just me and my mixer! The recipe included some different ingredients like bananas and pineapple...which I had never thought about adding to cake batter. 

As I suspected it was the most delicious, mouthwatering, sweet and savory, home-made cake I have ever had! It smelled like banana-nut bread and tasted like a dream...a carrot cake/banana-nut bread hybrid of pure yum! The cream cheese frosting paired well, giving it a little extra sweetness. The pineapple was not overwhelming either and the pecan...OMG the pecans!  I had to literally stop myself from consuming the whole thing. Here is the recipe from MyRecipes.com  and their link! 

Ingredients/Directions:

  • 3 cups all-purpose flour
  • 2 cups of sugar
  • 1 teaspoon salt
  • 1 teaspoon baking soda
  • 1 teaspoon ground cinnamon
  • large eggs, beaten
  • 11/2 cups vegetable oil
  • 1 1/2 teaspoons vanilla extract
  • (8-ounce) can crushed pineapple, undrained
  • 2 cups chopped bananas
  • 1 cup chopped pecans
  • Shortening
  • Cream Cheese Frosting
  • 1/2 cup chopped pecans

Preheat oven to 350°. Whisk together flour and next 4 ingredients in a large bowl; add eggs and oil, stirring just until dry ingredients are moistened. Stir in vanilla, pineapple, bananas, and 1 cup chopped toasted pecans. Spoon batter into 3 well-greased (with shortening) and floured 9-inch round cake pans.Bake at 350° for 25-30 minutes or until a wooden pick inserted in center comes our clean. 
Cool cake layers in pans on wire racks 10 minutes; remove from pans to wire racks, and cool completely (about 1 hour).
Place 1 cake layer on a serving platter. Spread 1 cup Cream Cheese Frosting over cake layer. Top with second layer, and spread 1 cup frosting over cake layer. Top with third cake layer, and spread top and sides of cake with remaining frosting. Arrange toasted pecan halves in a circular pattern over top of cake.
You should definitely make this cake!! 
-Bunny

Monday, March 14, 2016

Totally Surprised Birthday Cake

Howdy! 
I was missin True Blood somethin awful, plus I just got my new "Cake" dress in the mail so I thought how perfect!! Check out the link below to Amourdress. Now let's make a delicious cake to celebrate! 
In the True Blood Eats Drinks and Bites Cookbook there is a recipe for an awesome vanilla cake with lemon filling...OMG it was just begging to be made! This is the cake that Maryann, Karl and Eggs surprise Tara with for her birthday! Now I have never really made a cake from scratch...so it was a long process but completely worth it.
To start I made the lemon filling by combining the sugar, cornstarch and salt in a medium pan. I gradually stirred, bringing it to a boil over medium heat. After about a minute I removed the pan and stirred in the butter and lemon zest and gradually whisked in the lemon juice. Then set it aside to cool. I found that one good sized lemon made just enough juice and zest! After it had cooled I had a small taste and it was just like a lemon square...one of my favorite desserts!
Quickly I made the berry topping by slicing up strawberries and raspberries and sprinkling them with sugar. For the cake mix, I first preheated the oven to 350 degrees and greased/flowered two round pans. 
In my large mixing bowl I blended the flour, sugar, baking powder and salt then slowly added in the shortening, 2/3 cup of milk and vanilla. 
After mixing for about 2 minutes I added the remaining 1/3 cup of milk and the egg whites. Making sure to scrape down the sides of the bowl I mixed for a few more minutes and then the batter was ready to go into the pans! Jack was so interested but don't worry I didn't let him have any he he!
After pouring in the batter and placing the pans in the oven (for 30 mins) I started on the frosting. 
First I beat the egg whites until they formed soft peaks, then in a pan I heated up the sugar, corn syrup and water bringing it to a boil. Using a thermometer I made sure the mixture reached 242 degrees. Once it was ready I slowly poured it into the egg whites while the mixer was running. I kept mixing until the frosting held stiff peaks, then added in the vanilla! This frosting was probably the most difficult task in making this cake...we had some trouble with the sugar hardening but that's what this is for, to learn! I think I might have to try it again sometime he he.
After the cakes were done baking and had cooled I took one layer, flipped it, and spread the lemon filling on, almost to the outer edge. I placed the second layer, right-side up, on top of the filling. I took the frosting and started with the sides of the cake and moved to the top, evenly covering the cake. Once the frosting was on I added the yummy berries, letting their juices flow down the sides of the cake. 
The frosting was a bit melty he he! but it tasted so good! The cake itself was hardy and rich and definitely tasted home-made. The lemon filling was really tasty...the bit of tart helped to cut the sugary frosting, complimenting it. Absolutely the most perfect birthday cake...very much a good old-fashioned strawberry shortcake! I had to make myself stop eating it he he! SO GOOD!
My awesome dress is from Amourdress on Etsy: LINK
Thanks for readin!! 
Cheers, Bunny

Bloglovin

Follow on Bloglovin